
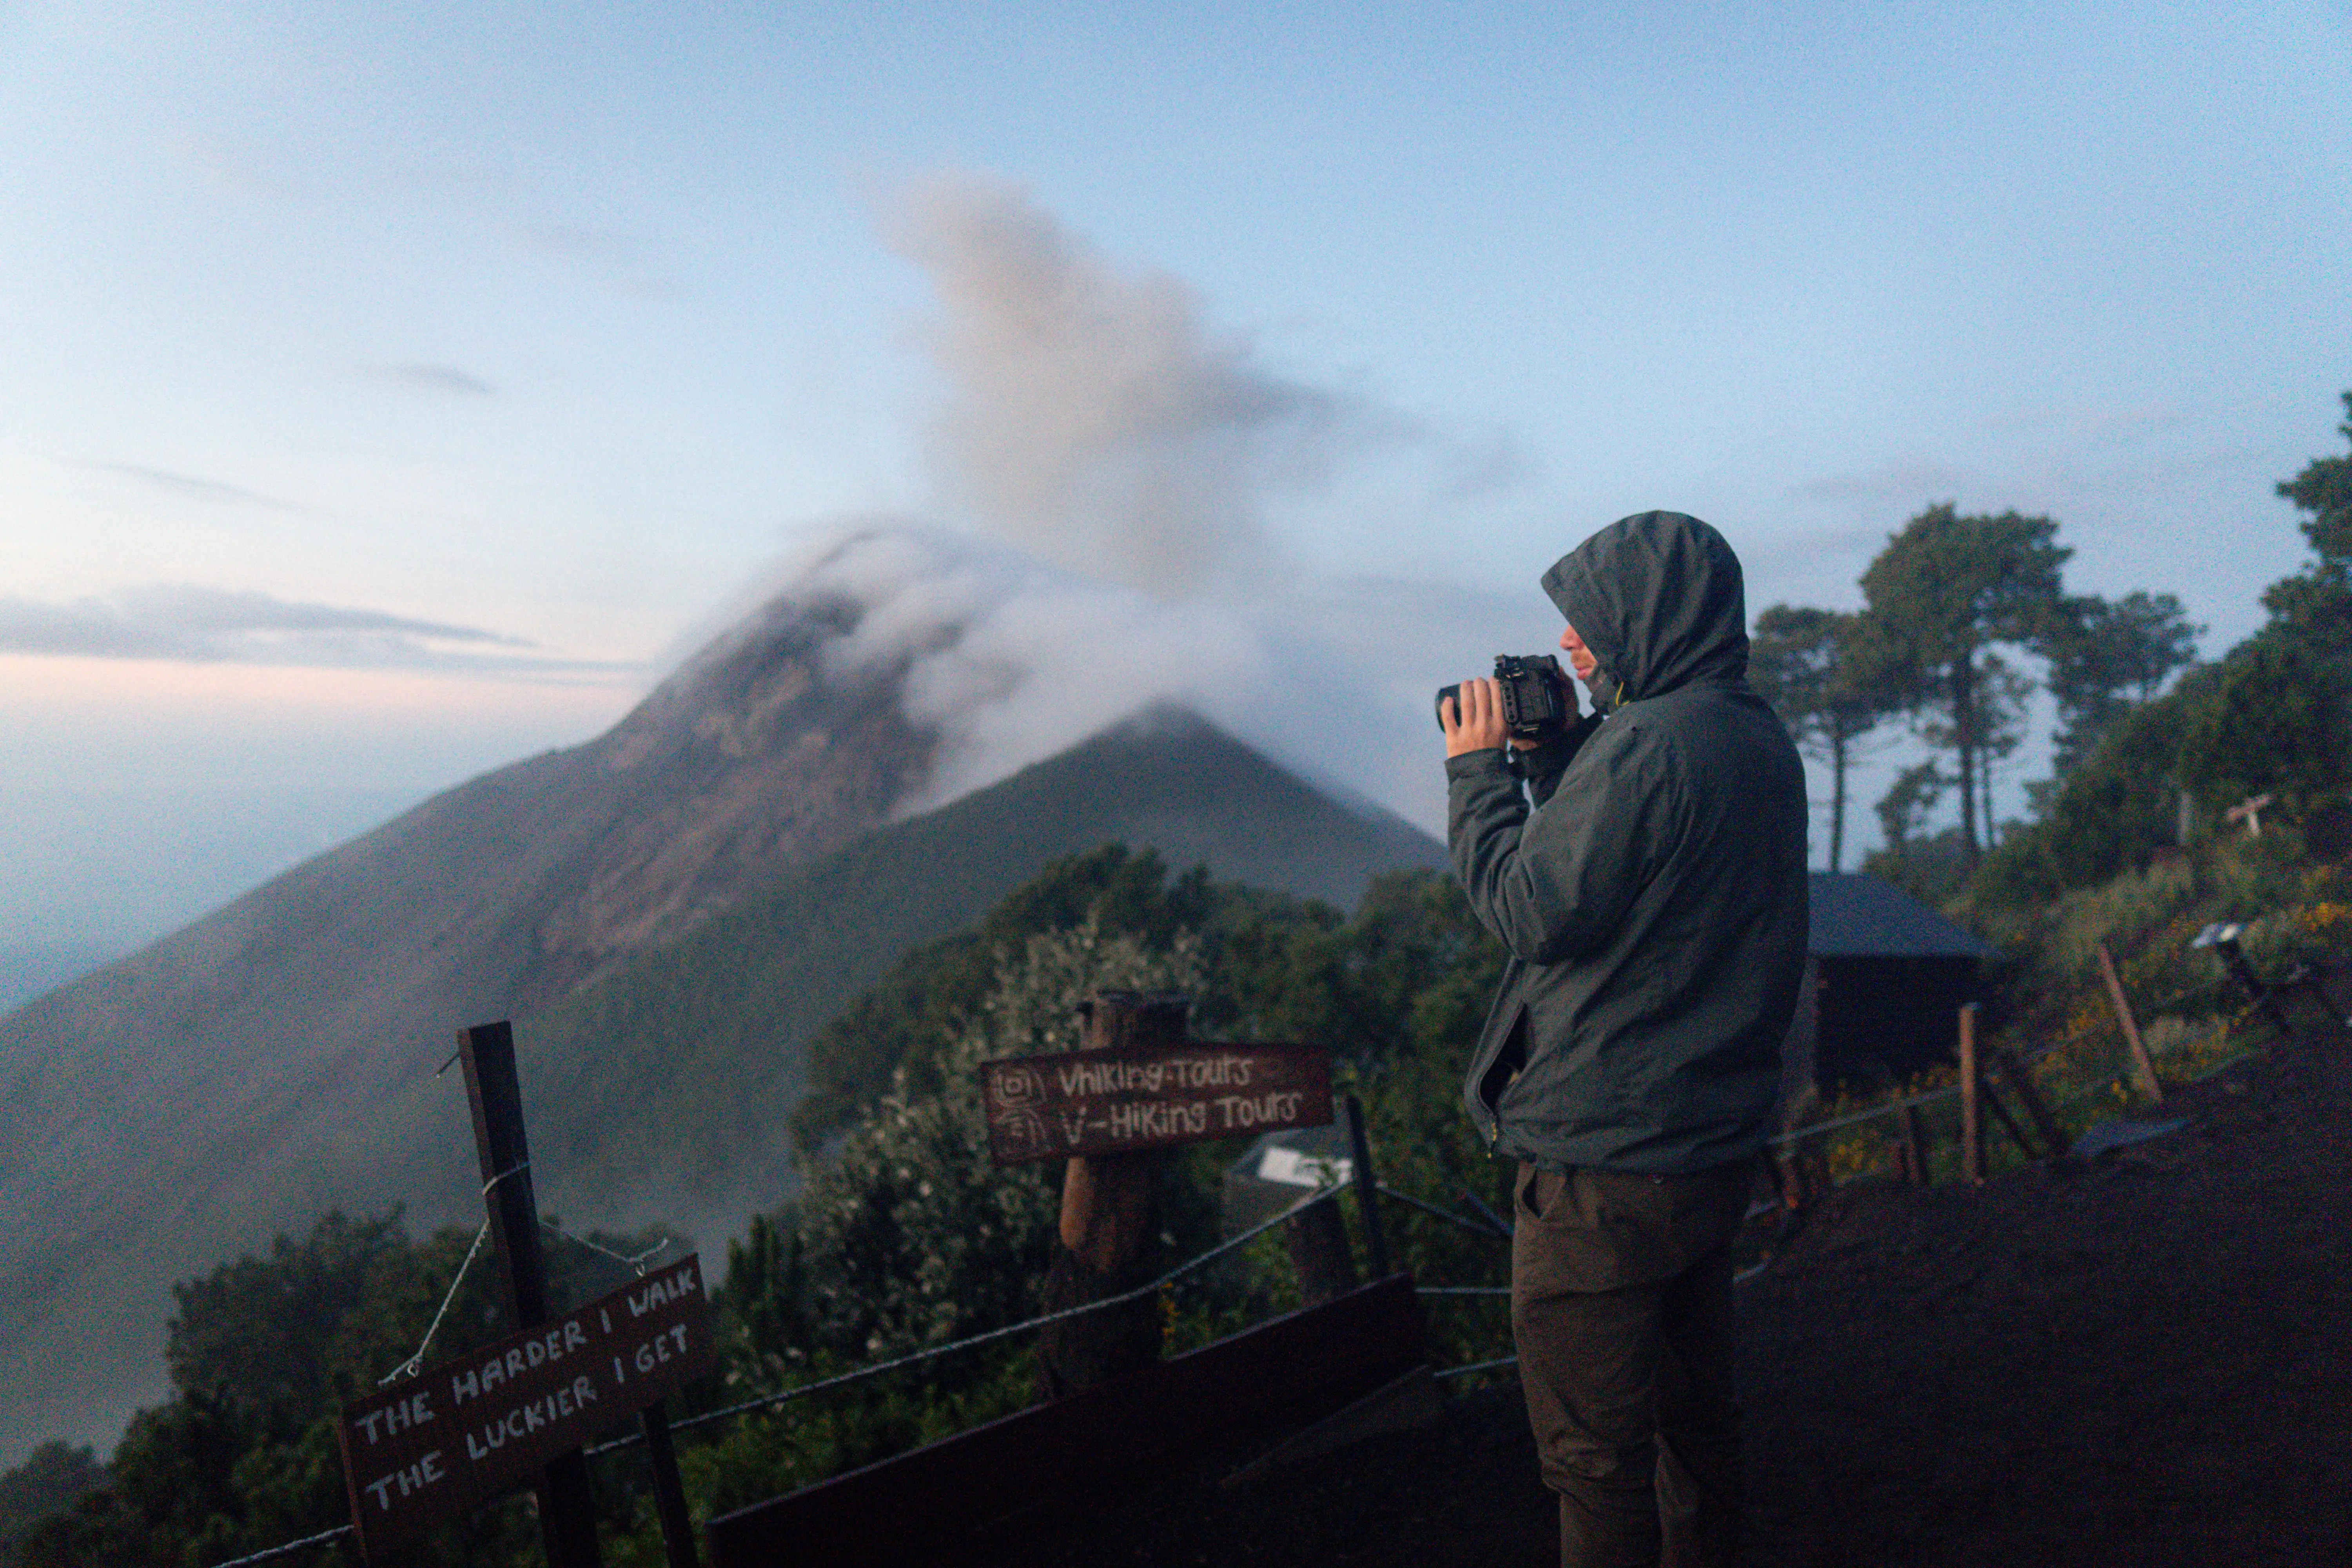
Climbing one volcano to watch another one erupt. That’s the idea behind the Acatenango hike, one of the most popular experiences in Guatemala. The country has plenty of volcanoes you can climb, but this one is something special, even if you only get a few brief windows of clear visibility.
If you’re planning to hike Acatenango, feel a little intimidated and have a million questions, you’ve come to the right place. Shall we?
Quick info for your trip 🌋
Elevation: 3,976 metres (13,044 ft)
Location: Chimaltenango, near Antigua
Usual starting point: La Soledad village
Classic hike duration: 2 days and 1 night
Best season: November to April
Difficulty: Challenging, but not technically difficult
What does hiking Acatenango Volcano involve?
Time and physical effort. Determination!
Acatenango Volcano reaches 3,976 metres (13,044 ft), and the goal is to get close to its summit to watch Volcán de Fuego erupt. Fuego is one of Guatemala’s most active volcanoes, which is why watching its eruptions is the main attraction. However, visibility and volcanic activity can never be guaranteed.
From Aldea La Soledad, the usual starting point for the hike, to the summit, the route is approximately 8 km long, with around 1,500 metres of elevation gain. Contrary to what you might read on other websites, you can hike Acatenango without booking a tour.
However, most travellers (myself included) choose to do the hike over two days. This gives you the chance to watch Fuego’s eruptions at night and again at sunrise. If you want to stay overnight, you’ll need a special permit, which means arranging an authorised overnight hike (more on that later)!
The Acatenango Hike is not That Difficult
In the age of social media, everything seems to become more exaggerated, bigger, more incredible and more extreme. So let me reassure you: climbing Acatenango isn’t as difficult as you might think.
When I climbed Acatenango, I didn’t even have proper hiking shoes, and one of my legs was still a little messed up after falling during the Death Road experience in Bolivia. And yes, I struggled! I got tired! But I had been so intimidated by everything I’d read beforehand that, when I finally made it to the top, I thought: Was that it?


Hold on! I’m not saying you should underestimate this hike. Climbing Acatenango is physically demanding. You’re gaining a lot of elevation over a relatively short distance, which means you’re going uphill for most of the way. And if that wasn’t tiring enough, you’re doing it at altitudes of over 3,500 metres (11,480 ft).
The good news is that the trail doesn’t involve any technical climbing. The main challenges are the physical effort, elevation gain and altitude. So, while you don’t need technical mountaineering experience, you should have a reasonable level of fitness and give yourself time to acclimatise.
⚠️ If you’re worried about your fitness level or simply don’t feel comfortable hiking all the way up, you can book a tour with a 4×4 vehicle that takes you to the camp.
What is the Acatenango Hike Like? My personal experience
The Acatenango experience actually starts in Antigua. That’s where the tour company you booked picks you up (in our case, V-hiking) and where you meet your fellow hikers on the bus. A little like the first day of school!
To make things easier to follow, I’m going to divide the trek into seven stages.
THE TRANSFER | Getting started
Most tour companies pick up their passengers in Antigua and drive them to the trailhead. However, the logistics can vary quite a bit depending on which company you choose.
For example, OX Expeditions has an office in Antigua and organises a meeting the afternoon before the hike to go over the details. This is particularly useful if you need to rent a lot of equipment.
With V-Hiking, we met early in the morning in the minivan from Antigua and drove to Erin’s mother’s house (Erin is the owner). We had breakfast there and received a full briefing about the hike. Shortly afterwards, we made the final drive to Aldea La Soledad, where the hike begins.
THE ASCENT | The challenging part
This is where the 4 to 6 hours of hiking begin.
Our guides had divided the route into eight rest stops. Not everyone in the group walked at the same pace, but this system helped us avoid getting too spread out along the trail.
Most of the path is narrow, and there are plenty of tour groups heading towards the camping area. However, towards the final, narrower section, each company follows its own route to its campsite. So it’s essential to keep an eye on your group! Seriously.
Until roughly halfway up, you’ll find several small stalls where you can buy snacks and water. The first one even sold crepes!
💁🏽♀️ What would I do?
I’d rent trekking poles, walk slowly at my own pace but avoid stopping too frequently, and bring plenty of snacks and chocolate! I’d also drink water regularly, even when I wasn’t thirsty, to stay hydrated at altitude.
And most importantly, I’d enjoy the experience! You’re in Guatemala, climbing a volcano!
THE CAMPSITE | Basic but beautiful!
Arriving at the campsite feels like a celebration! The type of cabins, huts or glamping accommodation varies depending on the tour company and, of course, the package you book.
With V-Hiking, there was a private cabin for two people, while the other cabins could accommodate three or four. In other words, depending on the package you choose, you might have to share your shelter with other hikers.
We went towards the end of October when demand was lower, and we were lucky enough to have the classic cabins to ourselves.
Besides the sleeping areas, most campsites have a little balcony with chairs where you can sit and enjoy the scenery, as well as a designated area for a campfire. There’s usually a very basic bathroom too, but with some of the best views you’ll find in Guatemala!


THE HIKE TO FUEGO | This is optional!
For an additional fee and a pretty demanding extra hike, you can walk towards the slopes of Volcán de Fuego itself!
We had terrible weather conditions. It was freezing, visibility was extremely poor, and the chances of seeing Fuego erupt were very slim. So I decided to stay at the base camp. Micha, on the other hand(Micha is my boyfriend, by the way, you’ll hear about him frequently!), decided to go.
The group usually sets off shortly before sunset for a hike of around three hours, covering just over 5 km. The photos looked promising, but in reality, they spent an hour crouching behind some rocks to shelter from the wind, while us-less-fit-hikers were enjoying a glass of wine around the campfire.
⚠️ Keep in mind
As of August 2026, access to Volcán de Fuego has been prohibited by the authorities following a period of intense volcanic activity. If a tour company offers you an excursion to climb Volcán de Fuego, most likely to be scamp or an illegal activity!
Restrictions can change depending on volcanic activity, so always check the latest official updates before your trip.
DINNER | And wine around the campfire
Dinner, breakfast and lunch are included in all the tours.
In our case, we received lunch before starting the hike, in a takeaway container that we had to carry ourselves (so leave some room in your backpack!). We could eat it whenever we wanted, which was actually quite convenient.
Dinner is usually the most elaborate meal, often pasta prepared by the guides while the group is away hiking towards Fuego (the volcano and/or the campfire, depending on the activity).
Dinner is served fairly early because the next day involves a very early start if you want to reach the summit of Acatenango before sunrise.
ACATENANGO SUMMIT | Zero visibility
The summit of Acatenango sits at 3,976 metres (13,044 ft) and promises incredible views, not only of Fuego and its eruptions but also of the other volcanoes in the area. To reach the summit before sunrise, the hike usually starts in the early hours of the morning, around 4 am.
Once again, my legs were hurting and the weather was awful, so I decided to get a couple of extra hours of sleep. After the previous night’s experience, Micha also decided to stay behind.
From the base camp, we had a couple of seconds with no clouds in the direction of Fuego, followed by a few more minutes of visibility towards Antigua and Volcán Pacaya.
💡 Heads uuuup!
I still really, really recommend going all the way to the summit of Acatenango! I regretted not doing it, even though some of our fellow hikers only got a few seconds of clear visibility.
THE DESCENT | More oxygen for everyone
After breakfast, the group gets together to start the descent. This part is much quicker and less tiring thanks to the higher oxygen levels at lower altitudes. However, most of the trail is covered in loose, sandy volcanic terrain, so using trekking poles will make a huge difference for your knees.
Once you get close to the bottom, the group is split into different vehicles depending on everyone’s destination; with V-Hiking, we could choose between continuing our trip in Guatemala towards Antigua or Lake Atitlán, for an additional fee.
💁🏽♀️ Planning your route around Guatemala? I recommend reading my guide to a 10-day Guatemala itinerary.

Which Tour Should you Book for the Acatenango Hike?
There are several companies offering Acatenango tours, and choosing the right one can make a big difference to your experience.
Here are a few options worth considering:
V-Hiking is a relatively small, locally run company. Its founder is from San José Calderas, one of the villages at the base of Acatenango, and the company has a great service as well as a positive mission supporting the local community. This is the company I chose for my hike.
OX Expeditions is a well-established company with plenty of experience. Its campsite is a little more stylish, and the company organises a meeting beforehand to go over the details. Prices are reasonable considering the service.
Volcano Expeditions is one of the best-selling options on GetYourGuide. We met several travellers who had booked with them, and they were happy with the guides and the overall service.
Wicho & Charlie’s; prices are a higher, but they offer very good equipment if you need to rent quality hiking gear. They’ve also been featured by National Geographic Traveller, which has made them a bit more famous.
What I would not recommend
I wouldn’t book just any tour you come across on the streets of Antigua simply because someone offers you a good price(I know this is something many of us do when travellin South America) but in this case, it’s important to check the company’s reputation before booking!
A girl we met in Antigua told us she had booked a very cheap tour (around 45 USD), and the whole experience had been a nightmare from the beginning. The guides walked ahead and abandoned the group, the mattresses at the campsite were wet, and there weren’t nearly enough blankets.
A cheap tour isn’t necessarily a bad tour, but you should know exactly what you’re paying for.
What makes one Acatenango tour different from another?
These are the main differences between tour companies and the things I’d pay attention to or ask about before booking:
- Type of accommodation: Tent, shared shelter or private cabin.
- Sleeping arrangements: Mattress, sleeping mat (this is particularly important), sleeping bag and blankets (also very important!).
- Meals included: Breakfast, lunch, dinner and snacks.
- Group size: Usually around 20 people, although some companies can take groups of up to 40.
- Guide support: How are the guides organised during the ascent?
- Equipment available: What type of clothing, trekking poles or other gear can you rent?
- Transport: Where does the tour depart from, and what is included?
- Cancellation and closure policy: What happens if the authorities restrict access due to volcanic activity or weather conditions?
- Price: Tours usually range from 60 to 130 USD per person.
Book your Acatenango tour in Advance!
During the high season, Acatenango tours can sell out very quickly. I’m talking about booking months in advance, not just a few weeks, especially if you’re travelling in a group of more than three people.
Many local companies have stricter cancellation policies. However, you can also book through platforms such as GetYourGuide or Viator, where some tours offer free cancellation. This can be a good way to secure your spot while keeping a little more flexibility.
Is this guide helping you? ☕
If you’d like to support the blog and help me keep making free guides, you can buy me a coffee!
What to pack for Acatenango Volcano: A complete packing list
It gets preeeetty cold at the top of the volcano, so dress in layers. Don’t be fooled by the little patches of sunshine you might see from down below!
You can also check out my favourite gear for this hike to get a better idea of what you’ll need.
Clothing for the Acatenango hike
- A proper insulated puffer jacket.
- A fleece
- Two thermal base layers, one for each day.
- A woolly hat and gloves, even if it’s warm in Antigua.
- At least two pairs of hiking socks (or three).
- A clean pair of leggings to sleep in.
- Hiking boots or trail shoes with good grip. I wore my Salomon XT-6 and they worked perfectly. However, if you have hiking shoes with good ankle support, even better!
💡 Heads up!
Don’t go overboard packing unnecessary stuff. You’ll be carrying that backpack all day, and trust me, every extra kilo from a bad packing decision will make a difference.
You can also hire a porter to carry some of your extra luggage, but honestly, you probably won’t need one!
Essential Hiking Gear
- Headlamp: you’ll need it for going to the bathroom at night and for the early-morning summit hike.
- Water: at least 3 litres per person.
- Energy snacks (or whatever motivates you to keep going!).
- Trekking poles (I rented mine there).
- Toilet paper.
- Camera or phone, plus a portable charger.
- If you get cold easily: hand warmers or one of those warming creams that heat you up quickly.
- Cash.
You can rent most of the equipment, including warm jackets, in Antigua. There are specialised rental shops, but you can also arrange everything through your tour company.
Where to stay before and after the Acatenango hike
Your tour will usually pick you up in Antigua, and I’d recommend spending a few days there beforehand. In fact, Antigua sits at an elevation of around 1,582 metres (5,190 ft) above sea level, which gives you a chance to start acclimatising before the hike.
If you haven’t booked your accommodation in Antigua yet, I invite you to you should check out my other guide with hand-picked hotels for different budgets.
After the tour, it all depends on where your adventure takes you next! In our case, we continued towards Lake Atitlán before crossing the border into Mexico. You can take a look at our 10-day Guatemala itinerary for more details.
Hiking Acatenango was one of those experiences that combines physical effort, cold, exhaustion and views that make every step worthwhile. Even though the clouds meant I didn’t get to enjoy the eruptions of Volcán de Fuego as much as I’d hoped, I’d do it all over again.
My advice is not to obsess over reaching the top as quickly as possible or booking the cheapest tour you can find. Choose your tour company carefully, prepare for the altitude and the cold, and let the mountain set the pace.
Thanks for making it all the way down here, fellow traveller. Enjoy Guatemala!
Guadi.
